Hello, PENPLEs
We are here again with artist @rang’s drawing tips.
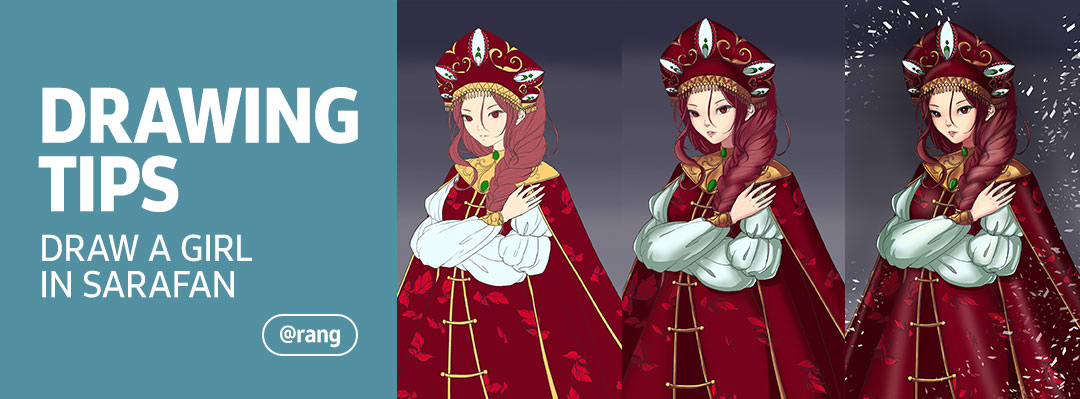
Following the Aodai tutorial last time, we will have a sarafan tutorial this time.
Sarafan is Russian traditional costume for women, which featured fitted trunk with long skirt combined in high-waist incision.
Sarafan usually goes on top of a blouse, and there are various colors including red, blue and green. Among them, the Russian women enjoy wearing red sarafan.
It is also the red sarafan that we will draw this time.
Then, shall we go ahead and start with Medibang Paint app?
Please follow step by step.

TUTORIAL by @rang
Draw a girl in sarafan
with MediBang Paint
Hello, PENPLEs. I am @rang.
As a part of the “drawing characters in the global costumes” tutorial, today’s theme is on “a girl in sarafan”.
This costume is quite different from the costumes that we’ve drawn up until now.
I’ve gone through quite many data, but there was no single costume similar to this.
But, it is certainly splendid, noble and beautiful.
Since this is a drawing tip, I’ve tried my best to express gracefully and splendidly with basic brushes and minimum colors.
This may look quite complicated. But we’ve got only quite more sketch lines, and the method is still similar to the past ones. I believe you could follow along quite well.
Now, let us begin.
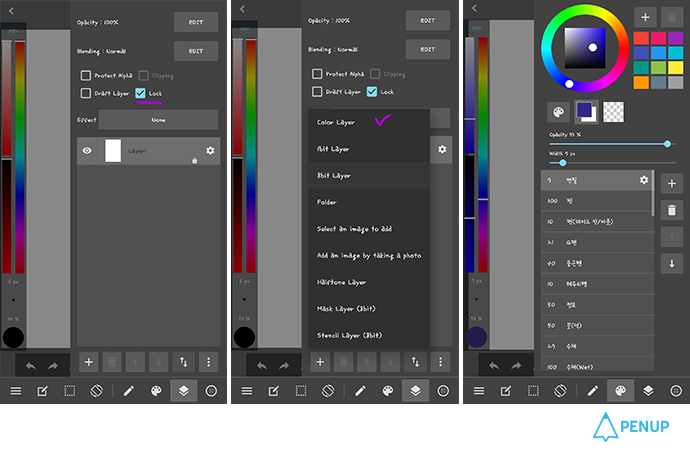
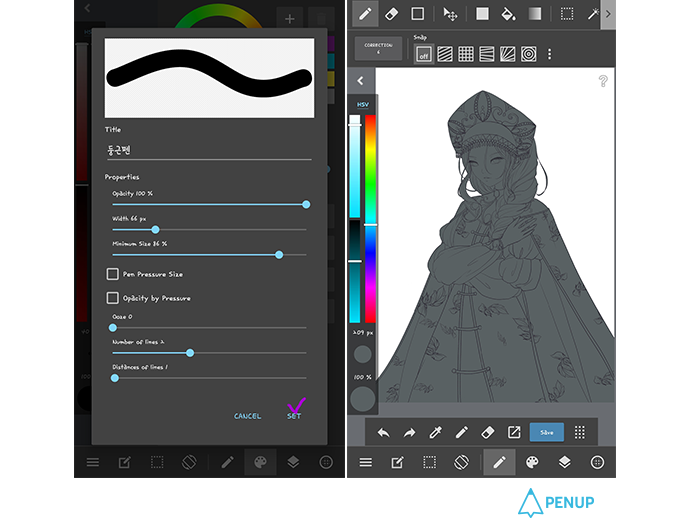
Prepare a canvas and basic pencil brush sets.
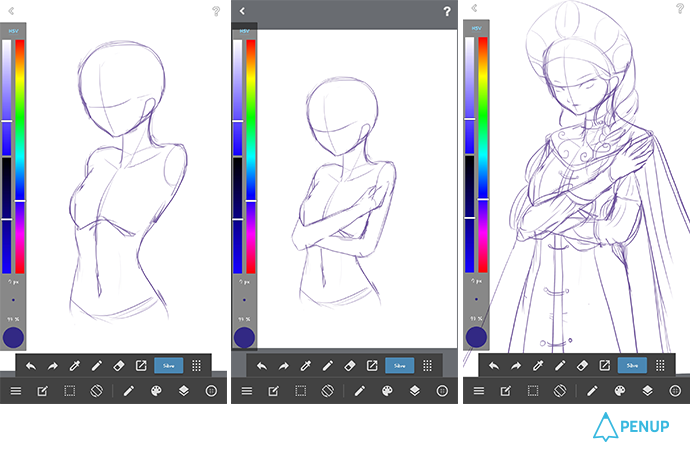
Draw in the basic outline and get some details of the gesture you’ve imagined.
Then, locate the costumes or decors.
The arms on my sketch are quite long. But I’ve revised them as I did the line drawing later.
Now we will do a sketch again.
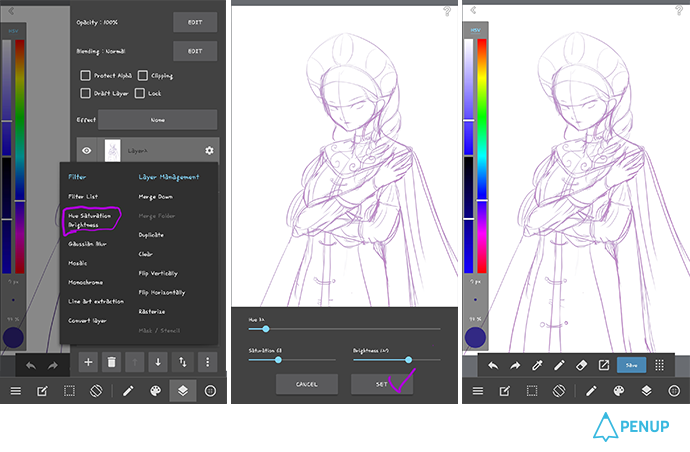
This is the basic feature in Medibang Paint; it is a feature that lets you adjust the luminosity, saturation and light level.
I adjusted the level of light in order to re-sketch with darker color on top of the first sketch layer.
This is quite effective when you don’t like the color that you’ve already painted.
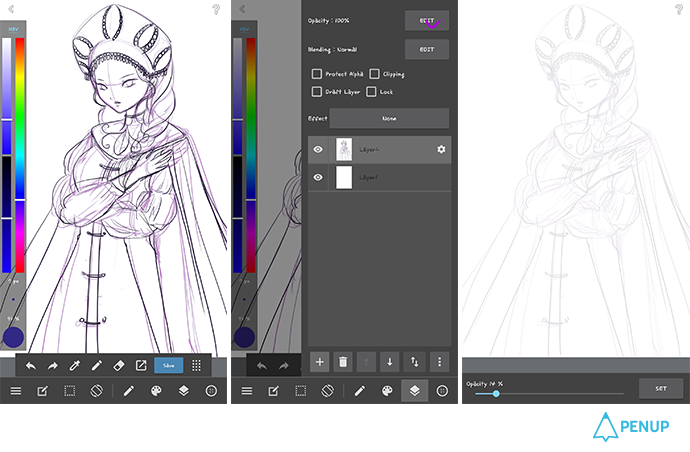
I outlined again with the darker color like this and revised the long arms.
Now, let’s adjust the opacity level of the layer.
It is recommendable to set it to 10-15%.
In this way, you would not see the very first sketch colors and will see the darker part that you draw later.
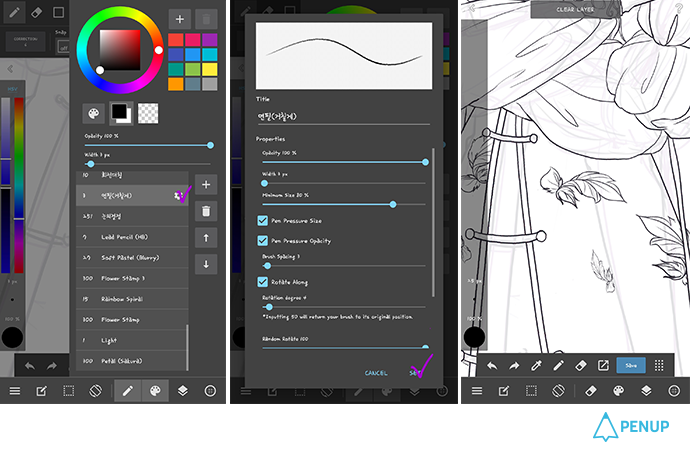
Add another layer and set the pencil brush to make it look as neat as possible.
I inserted patterns in the clothes.
I adjusted the size and direction by drawing one pattern and repeatedly doing copy & paste.
I was not able to do capture as I concentrated too much, but I will tell you in the next drawing tip.
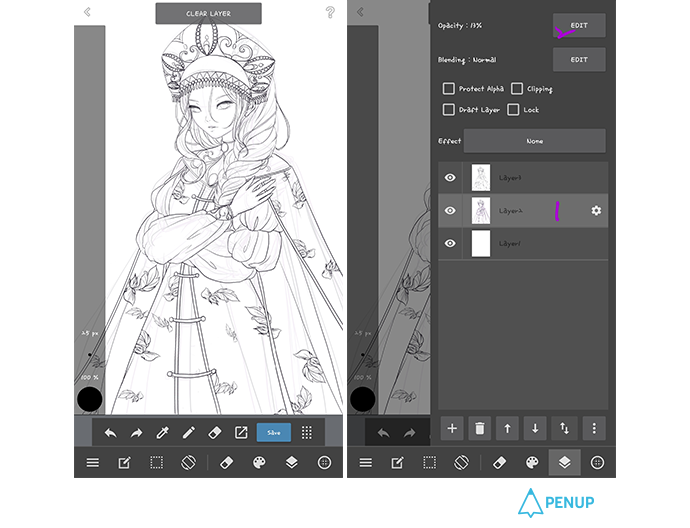
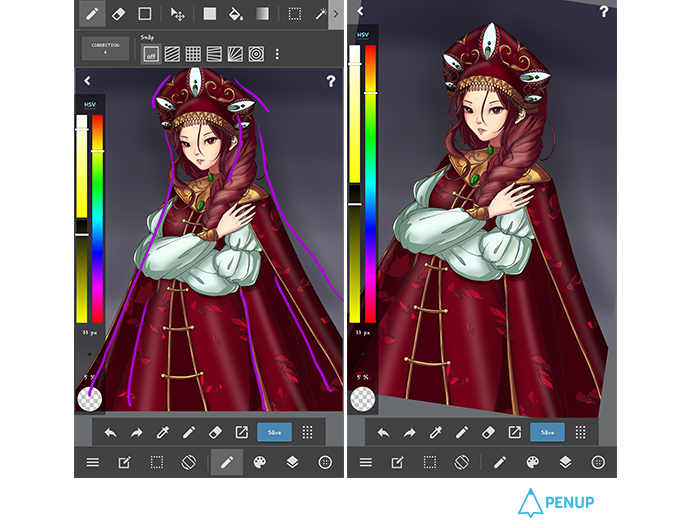
First, do a neat outline drawing.
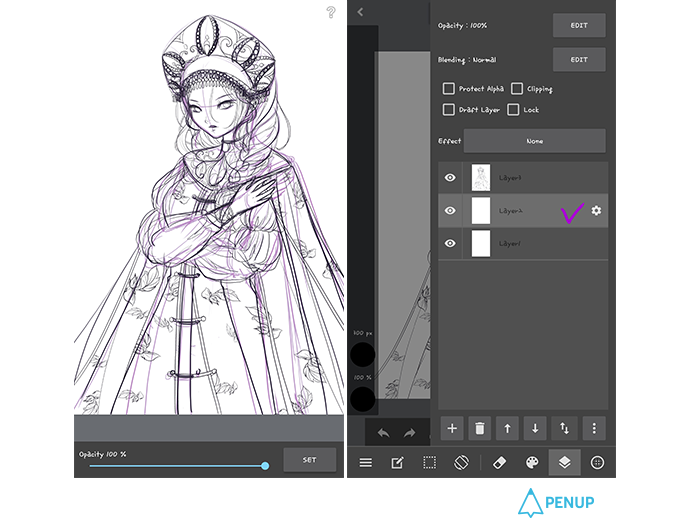
Then, set the opacity level of the first sketch layer to 100%.
You should either erase neatly or add a new layer after deleting the layer.
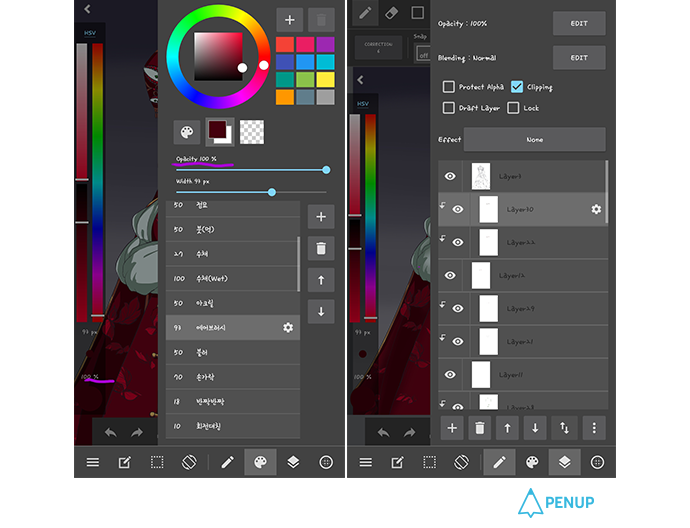
Then, fill in the under color carefully under the outline drawing layer.
You can paint very neatly if you set the pen pressure to maximum for the circular pen.
You can choose whatever color you like.
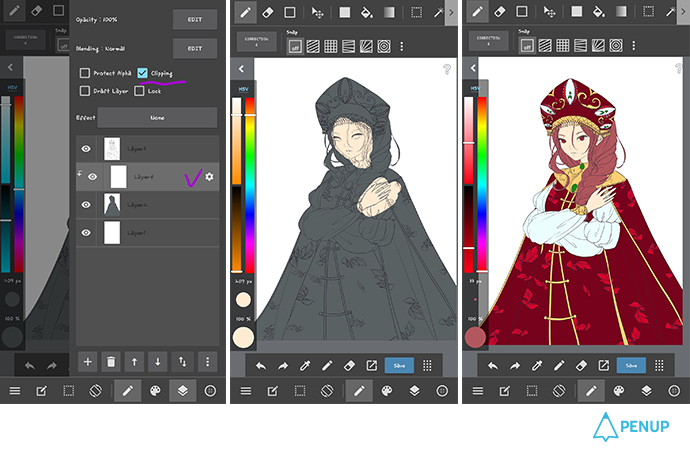
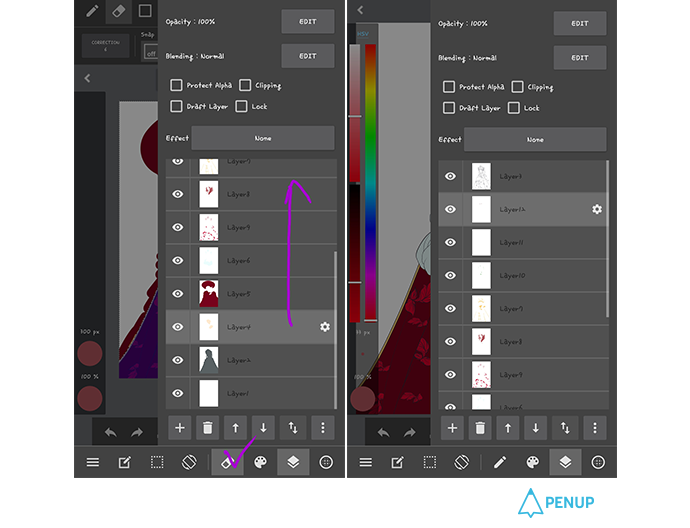
Add a new layer in between the outline drawing and under color.
Check the clipping and repeat this as you add new color.
It is recommendable to paint in the order of skin – clothes – hair – ornaments – eyes.
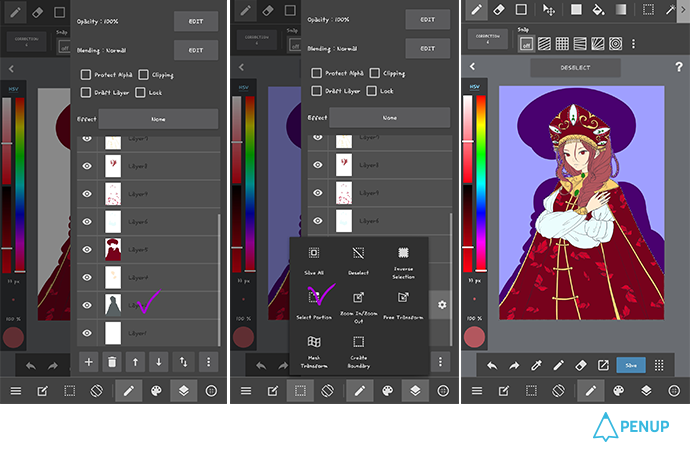
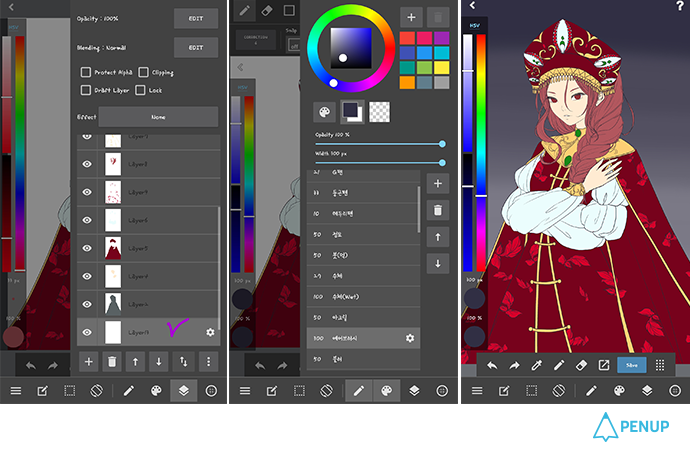
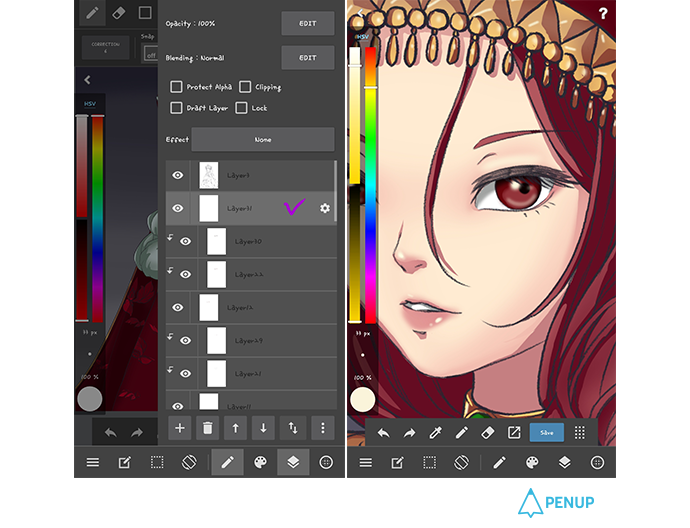
Unclick the clipping, and select the under color layer in grey.
When you use the selection tool, you will see that the character surrounding turns to purple.
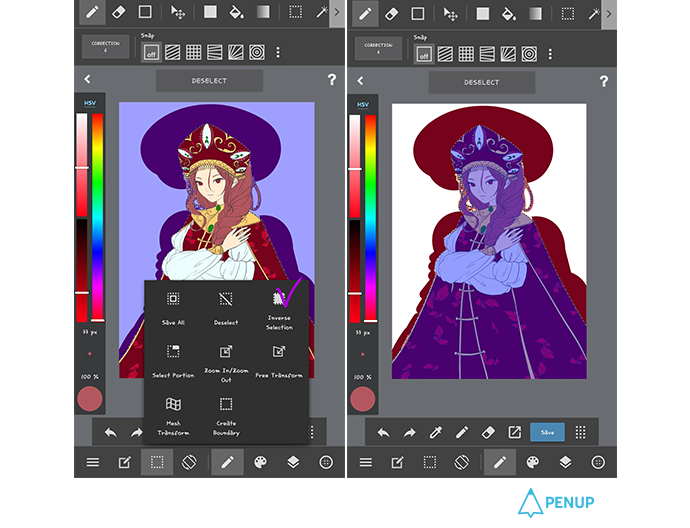
When you select “Inverse selection” in the selection tool, the character will turn purple.
At this moment, you just need to erase not so neat color around with the eraser in the order of the layers that you’ve painted.
Now, you will see that it became neat.
Add a new layer under the layer that you’ve painted with grey.
I adjusted the opacity level with the airbrush as I gave gradation with darker color.
It’s time to give light and shade.
Add a new layer onto each color and give light and shade with a color darker than the basic under color.
When you finish with the first shade and light, you will end up having a drawing like this.
You need to paint it by taking into consideration the direction of the light.
If you paint with a color that is nearer to black, it may make it look too thick. So be careful as you paint.

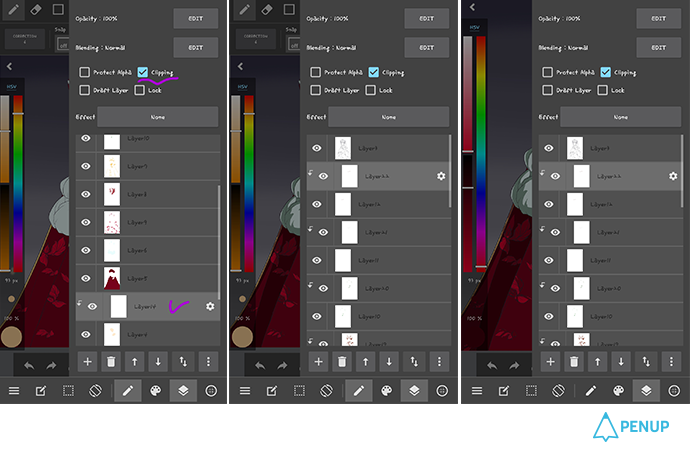
Add a second layer and check the clipping.
Then, give smooth barrier with the airbrush.
When you use the airbrush, you need to adjust the opacity level and do light slashes.
Airbrush has the effect of naturally merging the colors together even if you don’t use many colors as long as you adjust the density level well.
The drawing looks very soft, right?
For the highlight, I added another layer just under the outline drawing layer.
Then, I gave a highlight with an airbrush of a color that combined white and yellow with lowered opacity level.

Try to get the right density as you paint over in light color.
You will have a more natural texture if you make the jewel and marble eyes darker and lighter colored costume with bigger brush size.
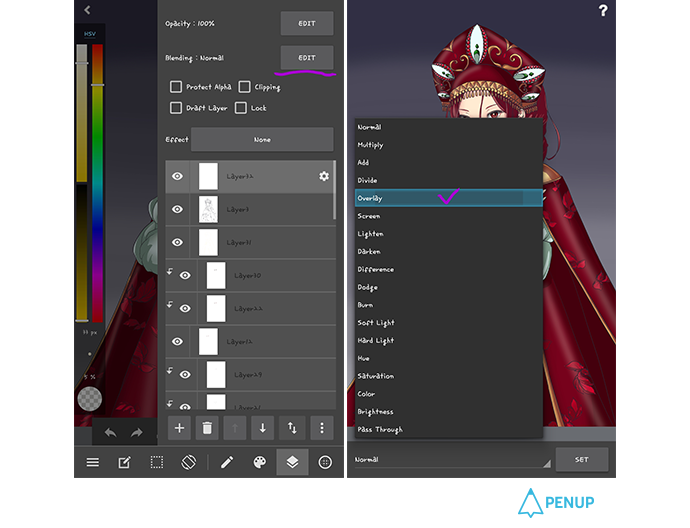
We will use an overlay function.
Add a new layer on top of the line drawing.
Then, select overlay in the blending setting.
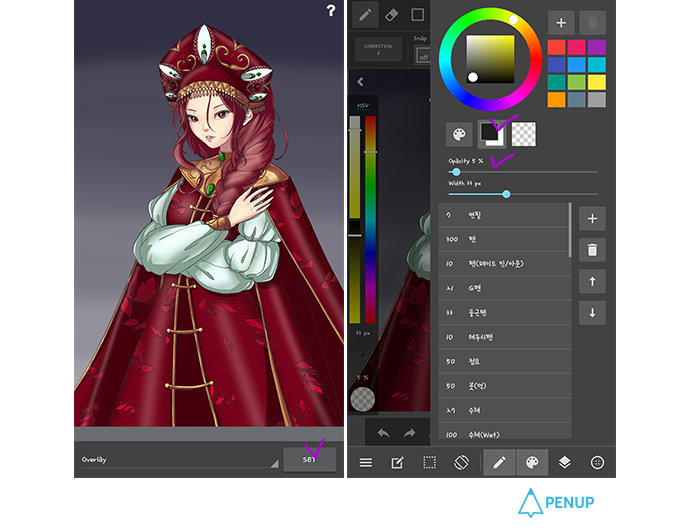
Set the airbrush opacity level with lighter color, and select darker color.
Paint the boundary between the background and the character, as well as the parts that need more light and shade.
If you paint darker bit by bit with lighter opacity level, the boundary between the background and the character will look more natural.
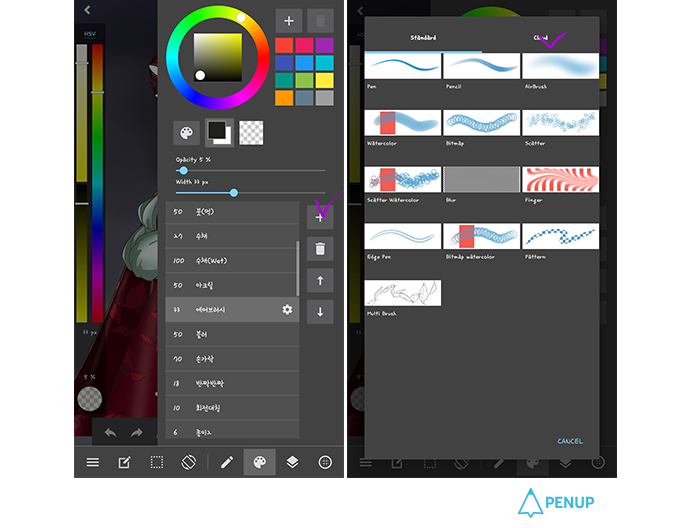
I will add a new layer and download a new type of brush to give more effect.
You will have more diverse brushes if you select the palette shape icon and choose to press +.
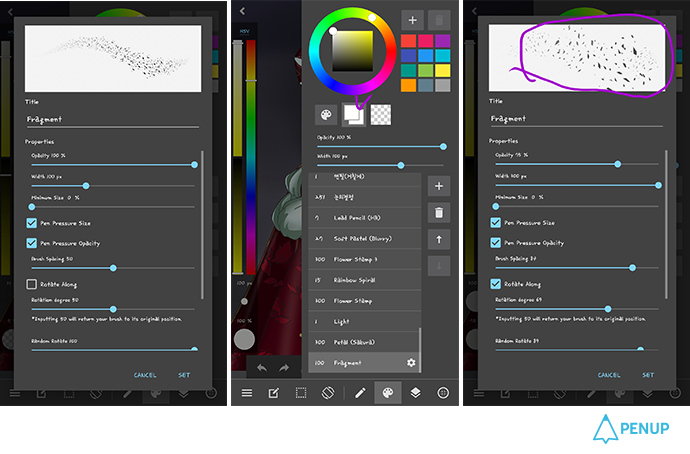
Download the brushes that you want and adjust the direction and size you prefer from the brush options.
Draw the lines around the character as if you are sprinkling.
It will be more effective if you adjust the opacity level of the eraser and erase a bit.
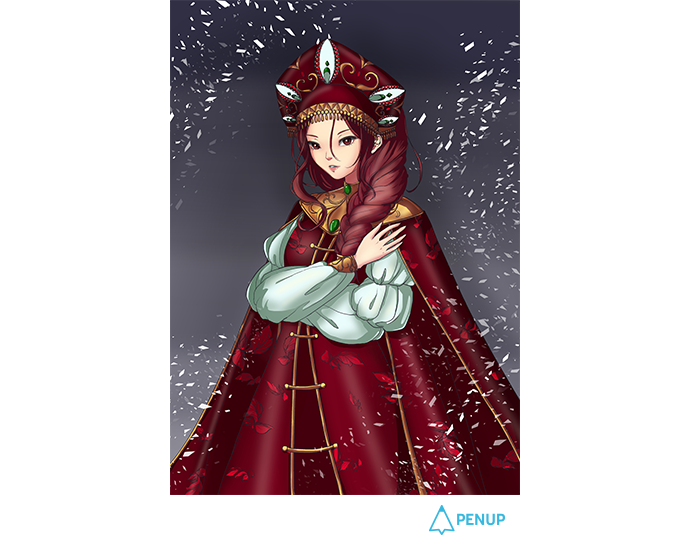
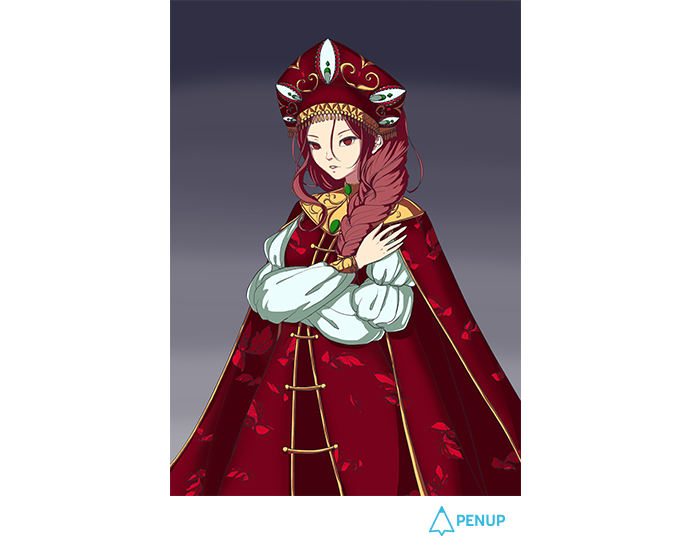
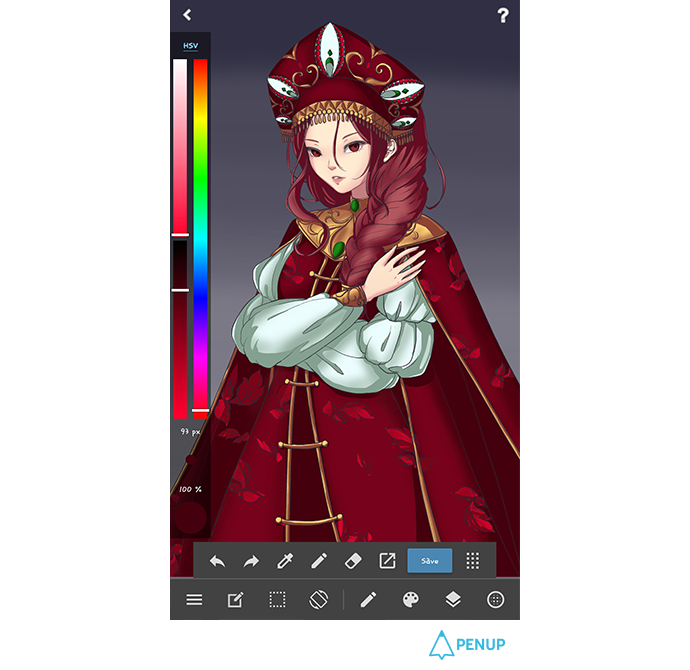
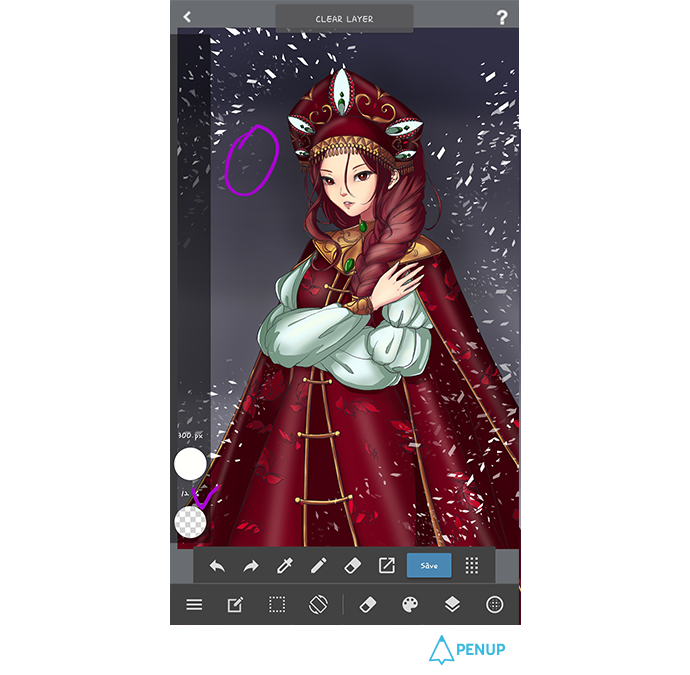
Now complete.
This is the end of our drawing tip for this time.
This seems to be the most colorful and splendid character I’ve drawn for the tutorials.
How was it for you?
I will put all the efforts for next drawing tips.
Thank you.
Did you follow along well?
As the artist said, it may look quite splendid, but you could draw totally new characters as you learn the new tools and practice to come up with different costumes.
I can’t wait to see what costume will come next for our drawing tips.
Please leave notes of thanks to artist @rang.
We will come back with another drawing tips next time. :)
PENUP - Share your drawings!
https://www.penup.com-The PENUP Team
 |
|