The chilly days are continued.
We have brought you the drawing tips that are just right for this season!
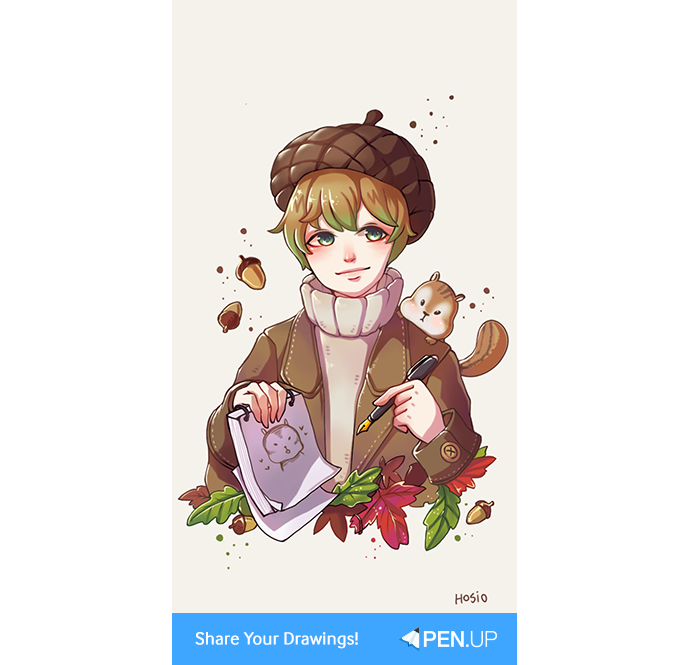
The drawing tips are by @hosio, the HOF of October, who has been loved by the PEN.Ples for hers cute character illustration.
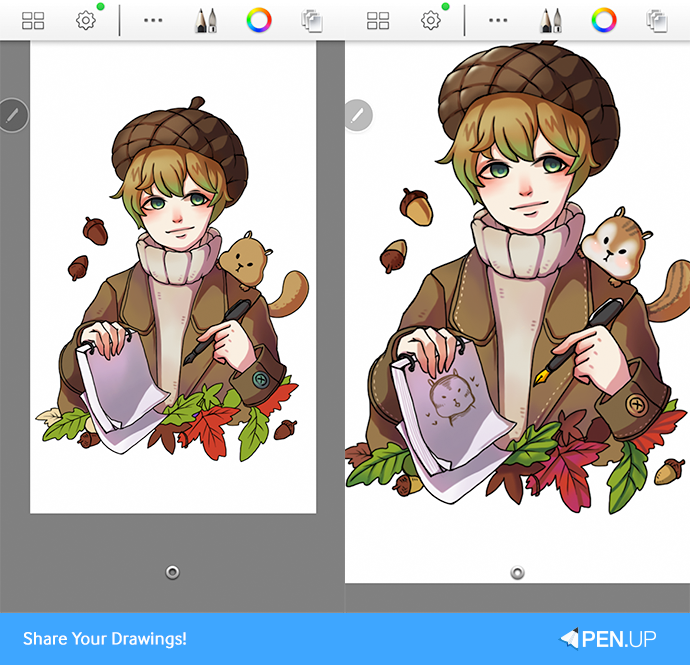
Today’s drawing tips are on “acorn boy”.
She introduced the illustration that makes you feel autumn season by personify the acorn, along with easy coloring tips.
Now, shall we begin?
TUTORIAL by @hosio
Draw acorn boy with Sketchbook
Hello.
I’m @hosio, a PEN.UP user.
I’ve ponder upon what drawing I should introduce for the drawing tips to our PEN.Ples.
Coming across the falling leaves, I’ve come across the thought of personifying the acorn.
By personifying the acorns, I’ve also drawing some other objects that signify autumn so that we can feel the autumn season at once!
Let’s start with the Sketchbook app.
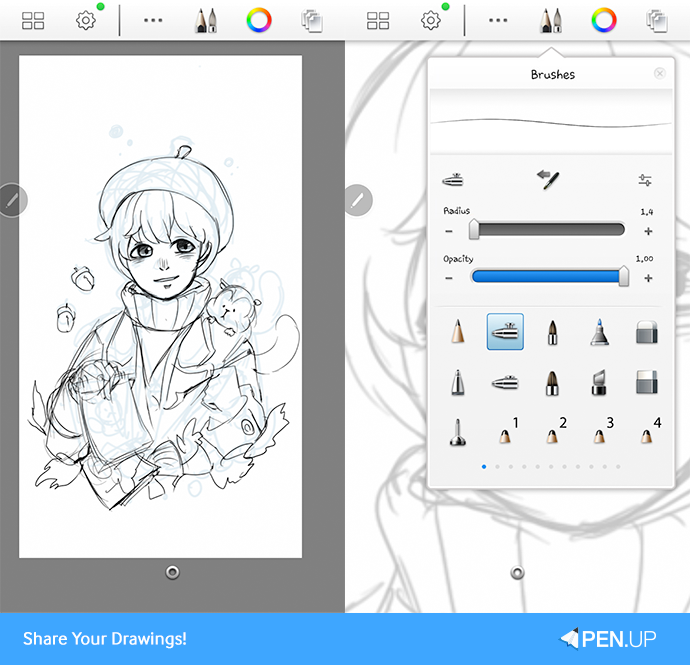
I’ve sketched a boy with a hat that seems like an acorn.
After finishing the sketch, add a new layer.
Get neat outline with the airbrush.
I like using 1.2 – 1.4 for the radius because they are fairly good.
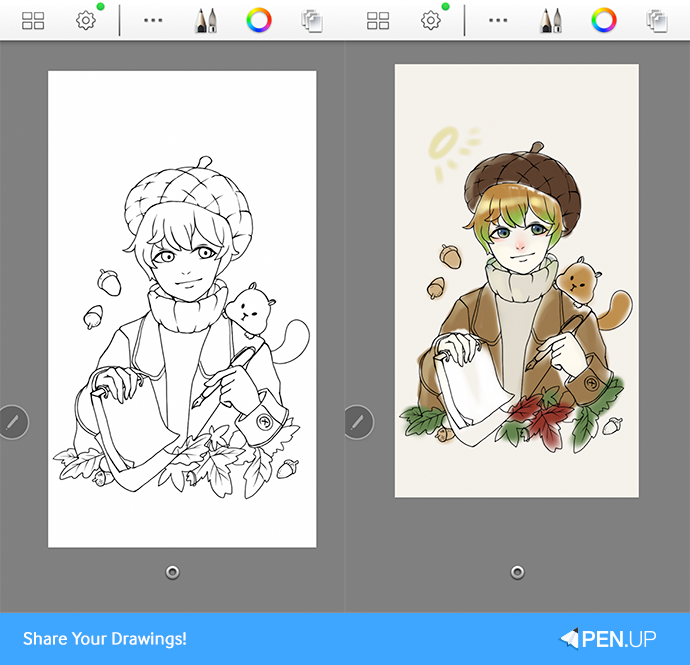
After getting the neat outline, think about what colors would be suitable.
Since my drawing is themed on the acorn and autumn, I will use a lot of brownish colors.
Now, I will tell you a tip on how to do a quick under coloring.
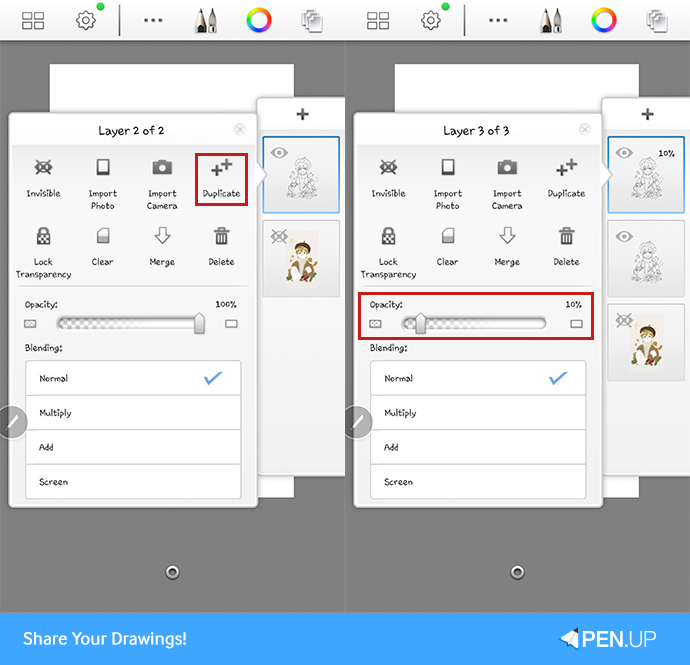
First, duplicate the sketch line layer.
Then, reduce the opacity of the copied later to 10%.
If you adjust the opacity before coloring, you can prevent the sketch line to become thick.
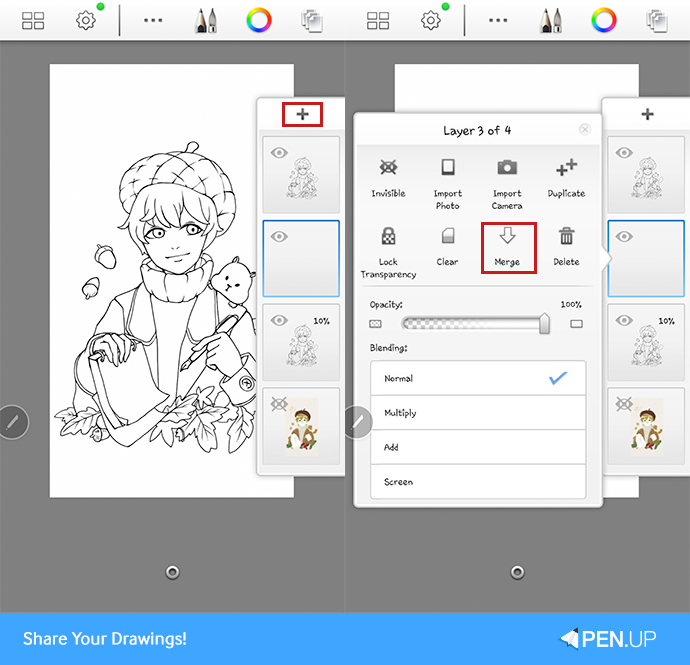
Add the new layer and merge it with the opacity 10% layer.
The reason you merge with the new layer is because we want the outline color to be think and color with the original color.
If you put the color in the layer with opacity of 10%, the color you wanted would end up in the opacity of 10%.
* Note: It may differ depending on the sketchbook app version.
If you can’t clarify the color within the app, you may also try to increase the opacity percentage.
A sheer sketch line should appear as it does in the picture.
Since you merged with the new layer, the opacity is 100%.
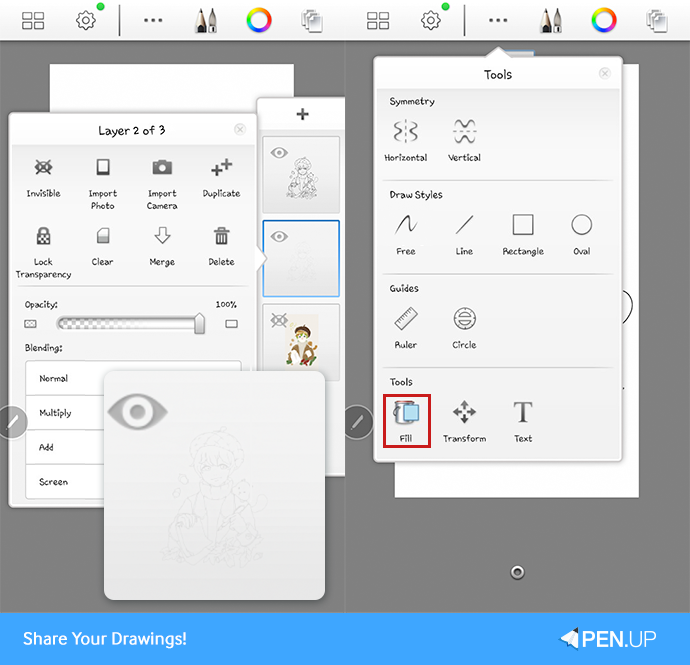
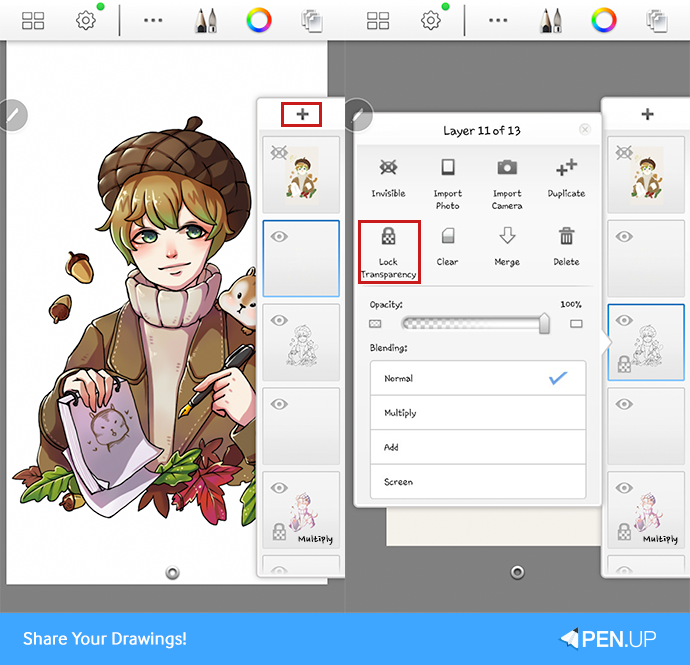
Now, duplicate as many as you want for the coloring.
Then, use the fill device to color differently.

After coloring differently, do lock transparency for the coloring layers.

After locking the transparent, do under coloring with the color you planned at first.
When you do the outline coloring, you may as well do some color differentiation for more natural looking coloring.
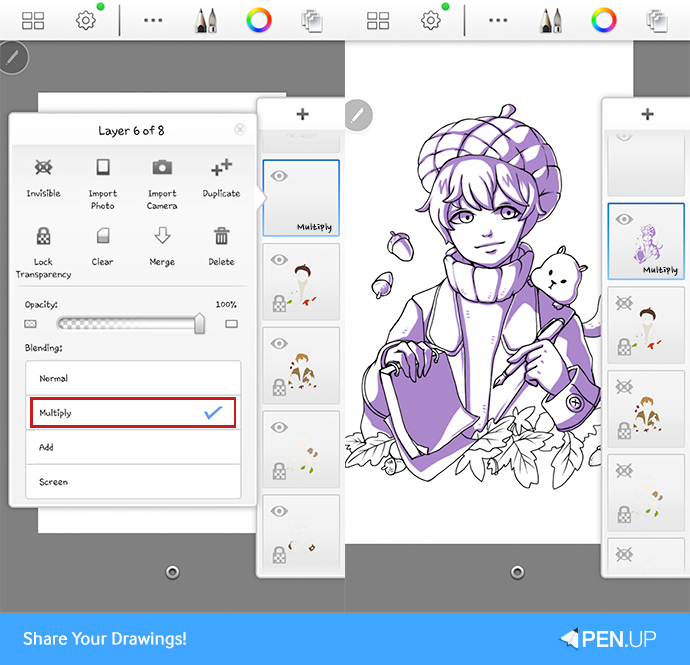
Once done with the under coloring, insert some shadows.
After adding the new layer, change the normal to multiply for coloring.
To do it easily and quickly, hide the outline coloring and outline the character’s shadow.
After inserting the shadow, show the outline color.
There are some parts that are quite awkward because I only used one color for the shadow.
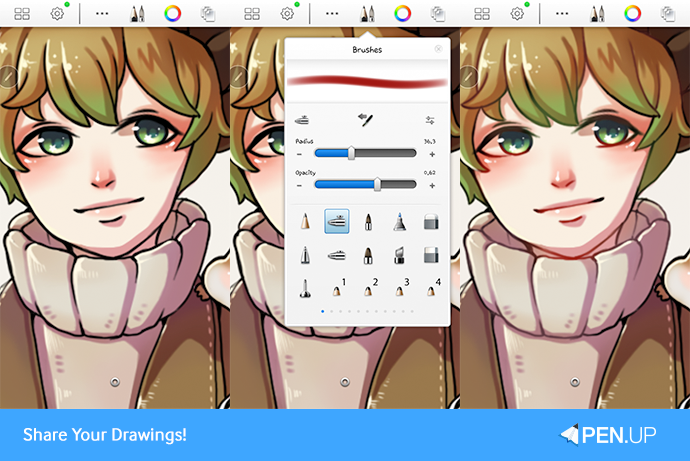
In this case, use the airbrush for coloring with the color suitable for the under color.
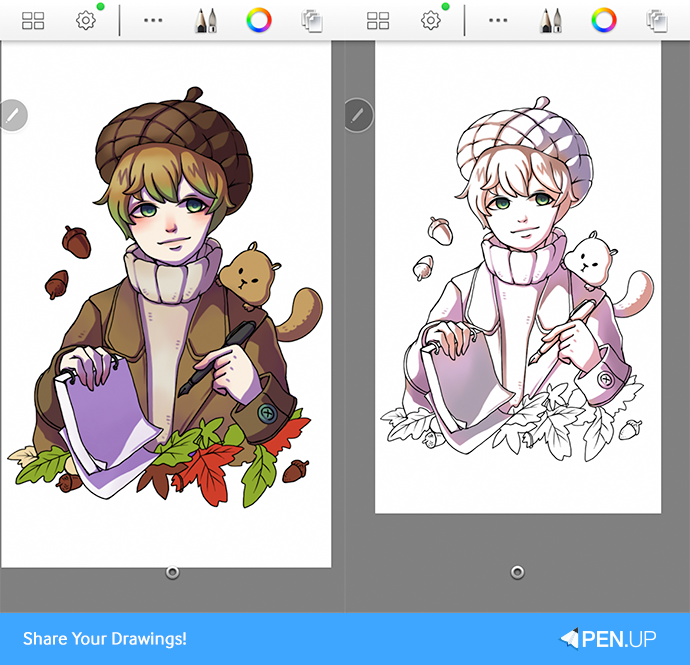
Once done with the natural shadows, let’s go for details.
Let’s draw in the needlework in the clothes, squirrel and leaves.
Add a new layer to depict the parts that get lights.
Rather than using just the black color for the sketch outline, you may well use the low toned color that is similar to the outline color for smooth picture.
Use the lock transparency to select quite redish color for the faceline color to make colorful drawing.
Lastly, color the background color that matches the atmosphere.
Then, decorate the surrounding and put in your signature.
Now, you are done with the acorn boy drawing!
Good job, everyone!
Thank you.
Use the coloring tip of @hosio to try out faster coloring!
Also, use the layer function to express the light and dark!
Thank you @hosio for your useful tips!
PEN.UP - Share your drawings!
http://www.penup.com-The PEN.UP Team
 |
|