[SKETCHBOOK] DRAW CASEBOT
2016-06-07. AM 09:01
Hi! PEN.Ples ^^
The artist presents a drawing tip everyone wants to know.
As a new member of HOF for August, 2014
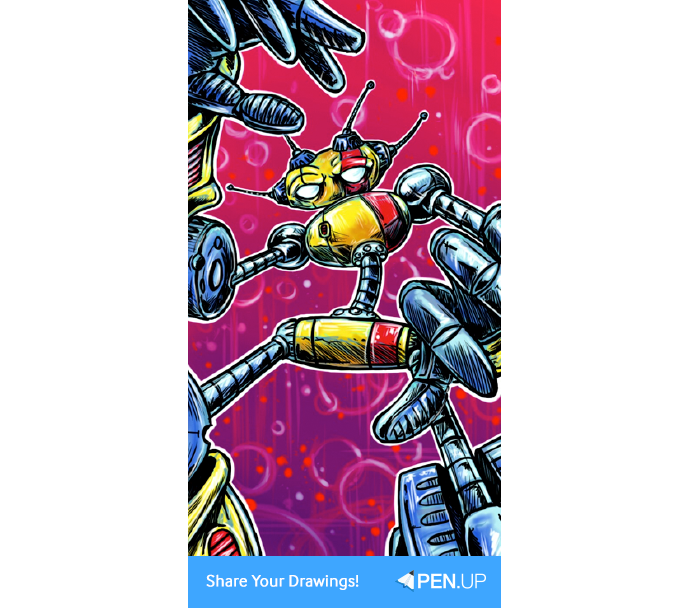
and one of the most popular artists on PEN.UP, @casebasket shows a process of creating a robot called ‘Casebot.’
Now, open Sketchbook app and follow the instructions.
TUTORIAL by @casebasket
Draw Casebot with Sketchbook
Hello everyone and greetings from me, Joshua, aka @casebasket.
Today I would like to show you a little about how I typically create art on Sketchbook pro on my phone.
I’ll be using ‘Case’ as my subject, as he is my biggest inspiration at the moment.
First of all, I must emphasize that I am not primarily a digital artist, and it is a field that is relatively new to me.

Because of that, I tend to enjoy a rougher look than what is typical of most digital art that I see around – basically, I like my digital work to look and feel similar to what I would do on paper or canvas, stray lines and evidence of layering included.
I make a conscious effort to leave the markings of how things were made specifically to remain true to my own personality and tastes, but you will all have your own ways of doing things and your own preferences.
First of all, I use basically two drawing tools in Sketchbook – the pressure sensitive line brush, and the airbrush.
I’ve experimented with all of them, but find myself the most at home with these particular ones.
Just as I would do on physical paper, I begin by creating a rough sketch using a light color.
I emphasize interesting composition, and do not shy away from things going off of the page.
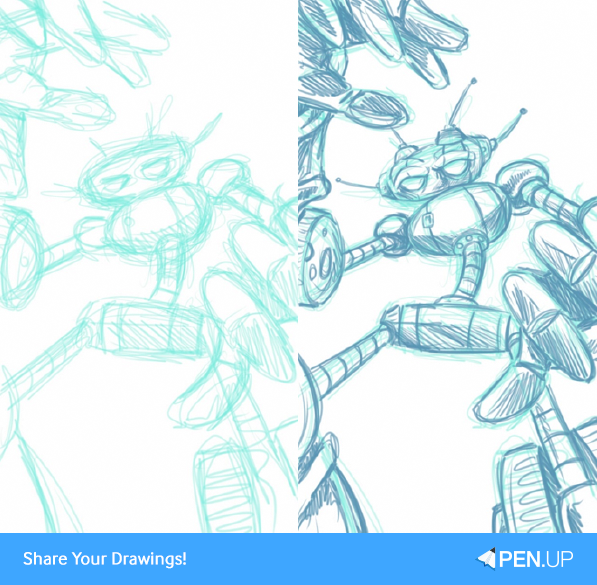
Once I like what I see (in this case it was mere moments), I add a second layer of a slightly darker color.
This is the case digitally and on paper.
Because I want the digital to be similar to analog, I will not end up hiding or deleting the original sketch, it will remain underneath the future layers and poke out from time to time.
These two layers are drawn with the pressure sensitive brush, but really it could just as easily be done with the airbrush.
I am constantly changing the opacity and sizing of the brushes, so there is no set standard.
Also on a side note, when it comes to this character, I made a choice long ago to have him (and all of the casebots) basic geometric shapes and forms.
This makes drawing the poses easy, but it must be said that to really get dynamic poses you really need to be able to rotate and turn these figures in your mind to get the full benefit.
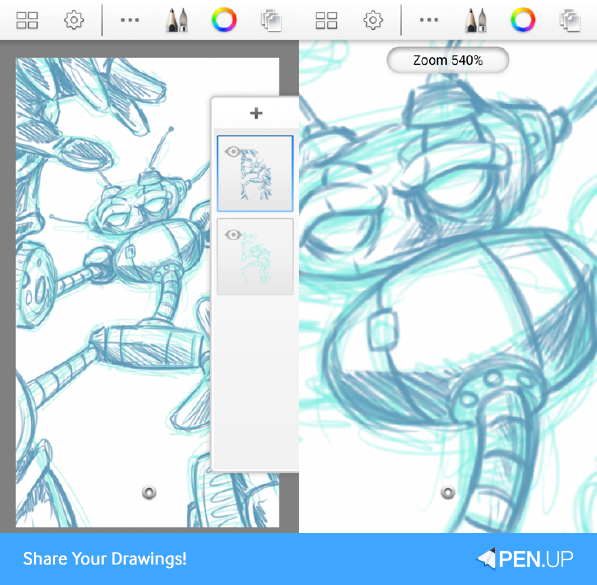
Next, I add basic color blocking with a third layer under the previous two with the airbrush set widely.
This lets me keep the stray lines, and I’m not concerned about being too careful with going outside of the lines.
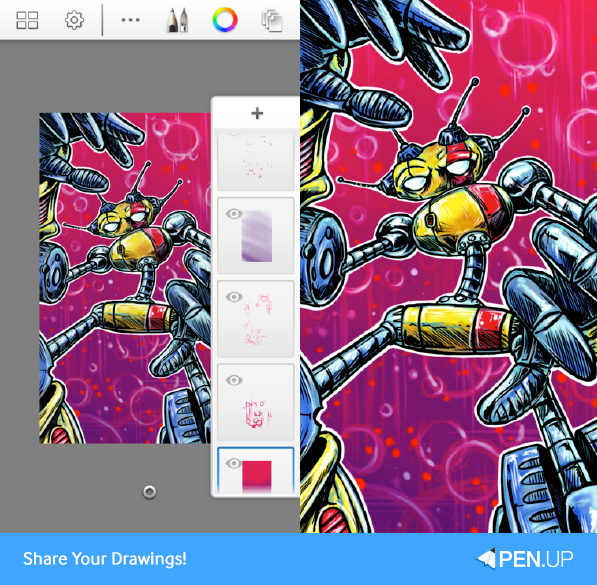
After that, I color fill another layer set at the very back.
This helps me see how opaque my figure is in the coloring process.
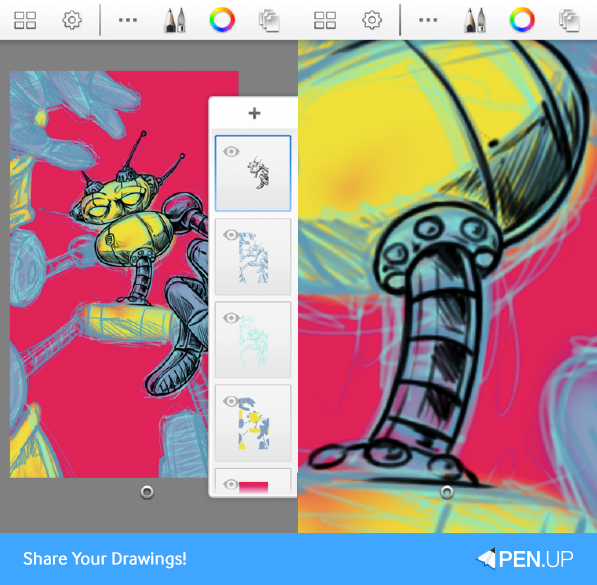
Now I add a fifth layer of black outlining on top of all of the others, just as I would do on paper.
This is done with the pressure sensitive brush to get a natural feel and look.
Next, I add a layer between the two original layers (the rough light blue and the slightly tighter darker blue).
By doing this, I can control how much of the rough lines that I want to show, and I add some subtlety to the coloration without getting too specific.
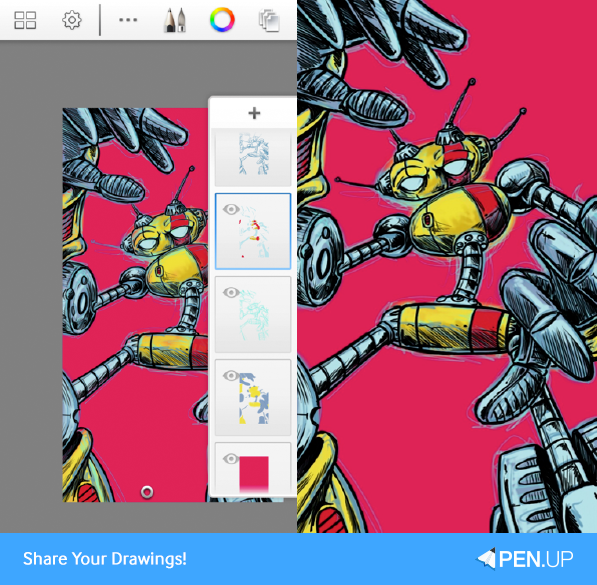
I then duplicate and merge the various layers independently to my liking, then merge all of the colored layers together.
(I save and save a copy at every crucial turn so that I can always undo anything that I might regret btw.)
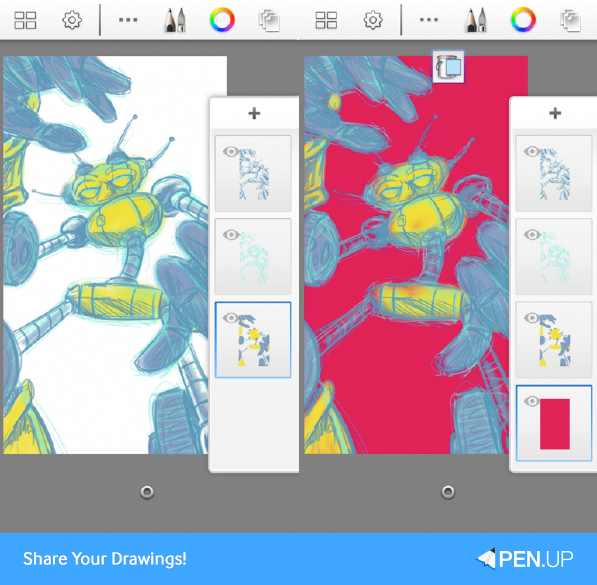
I continue on with the merged version and erase all of the color outside of the black lines, which are not merged yet.
Next, I add a layer between the background and the figure to get a nice white outline that I’ve gotten accustomed to doing on paper with a paint pen.
I also add a layer on the top of it all for the same reason – basically to imitate a white paint pen because I appreciate that graffiti-like pop.
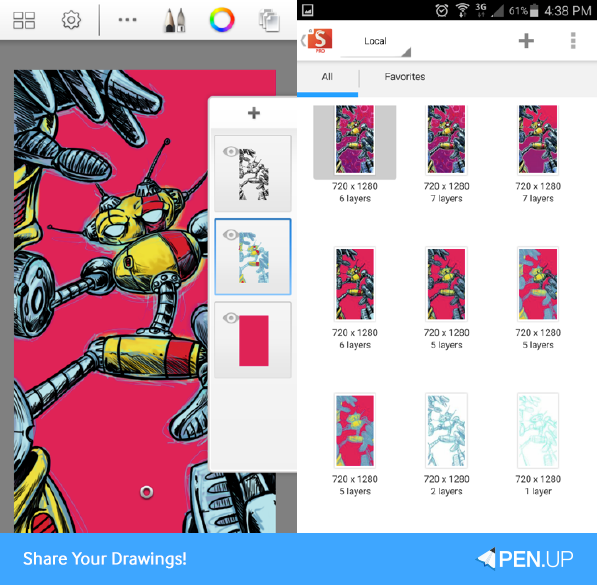
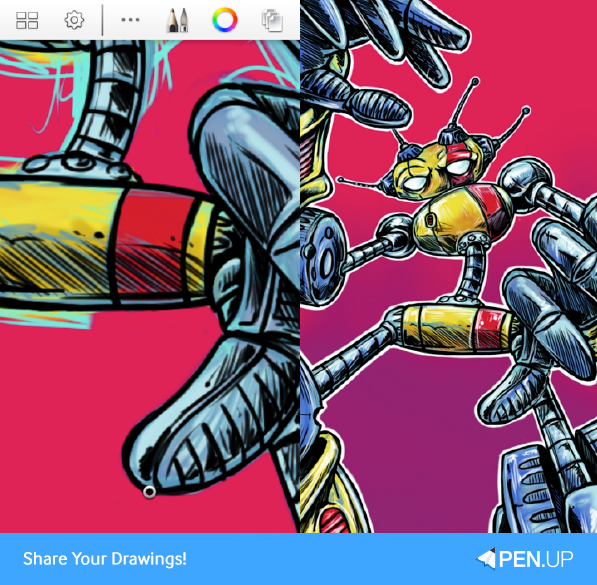
After that, I do a couple of layers of very simple design for the background, and there you have it! Well done ☺
For those of you who have known me for a while, this is not the only way that I do things digitally (but it is my typical go-to method).
Actually, it took much longer to write this and sort it out than it did to draw it (which was about an hour/hour and a half).
Thank you for enjoying my work!
Well done, everyone!
Actually, PEN.UP team has been pleased to learn @casebasket’s drawing tips.
We are sure PEN.Ple felt the same.
Once again, we are grateful to @casebasket for the tips.
You can expect the next drawing tips.
PEN.UP - Share your drawings!
http://www.penup.com-The PEN.UP Team
The artist presents a drawing tip everyone wants to know.
As a new member of HOF for August, 2014
and one of the most popular artists on PEN.UP, @casebasket shows a process of creating a robot called ‘Casebot.’
Now, open Sketchbook app and follow the instructions.
TUTORIAL by @casebasket
Draw Casebot with Sketchbook
Hello everyone and greetings from me, Joshua, aka @casebasket.
Today I would like to show you a little about how I typically create art on Sketchbook pro on my phone.
I’ll be using ‘Case’ as my subject, as he is my biggest inspiration at the moment.
First of all, I must emphasize that I am not primarily a digital artist, and it is a field that is relatively new to me.
Because of that, I tend to enjoy a rougher look than what is typical of most digital art that I see around – basically, I like my digital work to look and feel similar to what I would do on paper or canvas, stray lines and evidence of layering included.
I make a conscious effort to leave the markings of how things were made specifically to remain true to my own personality and tastes, but you will all have your own ways of doing things and your own preferences.
First of all, I use basically two drawing tools in Sketchbook – the pressure sensitive line brush, and the airbrush.
I’ve experimented with all of them, but find myself the most at home with these particular ones.
Just as I would do on physical paper, I begin by creating a rough sketch using a light color.
I emphasize interesting composition, and do not shy away from things going off of the page.
Once I like what I see (in this case it was mere moments), I add a second layer of a slightly darker color.
This is the case digitally and on paper.
Because I want the digital to be similar to analog, I will not end up hiding or deleting the original sketch, it will remain underneath the future layers and poke out from time to time.
These two layers are drawn with the pressure sensitive brush, but really it could just as easily be done with the airbrush.
I am constantly changing the opacity and sizing of the brushes, so there is no set standard.
Also on a side note, when it comes to this character, I made a choice long ago to have him (and all of the casebots) basic geometric shapes and forms.
This makes drawing the poses easy, but it must be said that to really get dynamic poses you really need to be able to rotate and turn these figures in your mind to get the full benefit.
Next, I add basic color blocking with a third layer under the previous two with the airbrush set widely.
This lets me keep the stray lines, and I’m not concerned about being too careful with going outside of the lines.
After that, I color fill another layer set at the very back.
This helps me see how opaque my figure is in the coloring process.
Now I add a fifth layer of black outlining on top of all of the others, just as I would do on paper.
This is done with the pressure sensitive brush to get a natural feel and look.
Next, I add a layer between the two original layers (the rough light blue and the slightly tighter darker blue).
By doing this, I can control how much of the rough lines that I want to show, and I add some subtlety to the coloration without getting too specific.
I then duplicate and merge the various layers independently to my liking, then merge all of the colored layers together.
(I save and save a copy at every crucial turn so that I can always undo anything that I might regret btw.)
I continue on with the merged version and erase all of the color outside of the black lines, which are not merged yet.
Next, I add a layer between the background and the figure to get a nice white outline that I’ve gotten accustomed to doing on paper with a paint pen.
I also add a layer on the top of it all for the same reason – basically to imitate a white paint pen because I appreciate that graffiti-like pop.
After that, I do a couple of layers of very simple design for the background, and there you have it! Well done ☺
For those of you who have known me for a while, this is not the only way that I do things digitally (but it is my typical go-to method).
Actually, it took much longer to write this and sort it out than it did to draw it (which was about an hour/hour and a half).
Thank you for enjoying my work!
Well done, everyone!
Actually, PEN.UP team has been pleased to learn @casebasket’s drawing tips.
We are sure PEN.Ple felt the same.
Once again, we are grateful to @casebasket for the tips.
You can expect the next drawing tips.
PEN.UP - Share your drawings!
http://www.penup.com-The PEN.UP Team
TOP